
Makes one 23×23 cm / 9×9 inch pan (16–25 bars depending on size).
Base Mixture
-
3 cups crispy rice cereal or cornflakes, lightly crushed
-
1 cup chopped nuts (peanuts, almonds or hazelnuts) – optional but delicious
-
2 cups milk chocolate chips
-
1 cup butterscotch or semi-sweet chocolate chips
-
½ cup peanut butter (smooth or crunchy)
-
2 tablespoons butter or coconut oil
-
1 pinch salt
Optional Topping
-
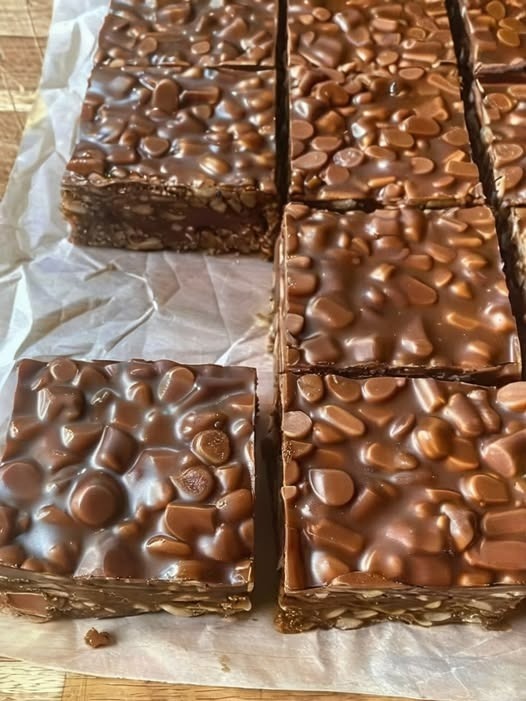
A small handful of extra chocolate chips or chopped nuts to press on top for that chunky, textured look (like in the photo)
Step-by-Step Instructions
1. Prepare the Pan
-
Line a 23×23 cm / 9×9 inch square pan with parchment paper, leaving some overhang on two sides to lift the bars out later.
-
Lightly butter or spray the pan if you want extra security against sticking.
2. Melt the Chocolate Mixture
-
Add the following to a large, microwave-safe bowl:
-
Milk chocolate chips
-
Butterscotch or semi-sweet chips
-
Peanut butter
-
Butter or coconut oil
-
Pinch of salt
-
-
Microwave in 20–30 second bursts, stirring well after each burst, until the mixture is completely melted and smooth.
-
Be patient and don’t overheat; as soon as most of the chips are melted, just keep stirring until the rest melts from the residual heat.
-
💡 No microwave? Use a double boiler: place the bowl over a pot of gently simmering water and stir until everything is melted and silky.
3. Add the Crunch
-
Pour the cereal and chopped nuts (if using) into the melted chocolate mixture.
-
Use a spatula to gently fold everything together until every flake and nut is nicely coated and glossy.
-
The mixture should be thick but still spoonable.
-
If it seems too thin, add a bit more cereal. If too dry, melt a little extra chocolate and stir it in.
4. Press into the Pan
-
Scrape the mixture into your prepared pan.
-
Use a spatula or the back of a spoon to spread it into an even layer.
-
For a smoother top, place a piece of parchment on top and press firmly with your hands or the bottom of a glass.
-
To get that chunky, bumpy look like in your photo, sprinkle a few extra chocolate chips or chopped nuts on top and gently press them in.
5. Chill Until Firm
-
Place the pan in the refrigerator for 1–2 hours, or until the bars are completely firm.
-
Once set, lift the whole slab out of the pan using the parchment overhang and place it on a cutting board.
Use a sharp knife to cut into:
-
16 large squares for generous dessert bars, or
-
25 smaller squares for party trays and cookie boxes.
How to Store the Bars
-
Keep the bars in an airtight container at cool room temperature for up to 5 days.
-
In warm weather, store them in the fridge so the chocolate doesn’t soften.
-
They also freeze well: wrap tightly and freeze up to 1–2 months. Thaw in the fridge before serving.
These are perfect make-ahead treats for busy Christmas weeks.
Easy Variations
Once you know the base recipe, you can create different versions:
1. Nut-Free Crunch Bars
-
Skip the nuts and add:
-
More cereal, or
-
Mini marshmallows, or
-
Dried fruit (raisins, cranberries).
-
-
Great for school parties where nuts aren’t allowed.
2. Dark Chocolate Lovers
-
Use all dark chocolate chips instead of milk + butterscotch.
-
Add a little extra sugar if you want them sweeter or leave them as-is for a more grown-up flavor.
-
Sprinkle a bit of flaky sea salt on top before chilling.
3. White Chocolate Festive Bars
-
Replace some of the chocolate with white chocolate chips and add dried cranberries and pistachios for Christmas colors.
4. Peanut Butter Overload
-
Use crunchy peanut butter.
-
Top with chopped peanuts and a drizzle of melted peanut butter once chilled.
Serving Ideas
-
Slice into neat squares and stack them on a plate (like your photo) for a party centerpiece.
-
Include them in your Christmas cookie trays and gift tins.
-
Pack a couple of squares in lunch boxes for a special treat.
-
Crumble one bar over vanilla ice cream for an easy dessert.
They’re rich and satisfying, so a little goes a long way—but don’t be surprised if people keep coming back for “just one more square”.
