
For the Bliss Bite Centers
-
1 cup (250 g) creamy peanut butter (not natural/runny)
-
2 tablespoons unsalted butter, melted and slightly cooled
-
1½ cups (180 g) powdered sugar, sifted
-
¾ cup (75 g) graham cracker crumbs
-
or digestive biscuit crumbs
-
-
1½ cups crushed Butterfinger bars
-
about 6 regular bars (2.1 oz / 60 g each) or 10–12 fun-size bars
-
For the Chocolate Coating
-
400 g (about 14 oz) chocolate candy coating
-
or semi-sweet / milk chocolate chips
-
-
2 teaspoons coconut oil or neutral vegetable oil (if using regular chocolate)
For Decoration (Optional)
-
Extra crushed Butterfinger pieces
-
A little sea salt for a sweet-salty finish
Step-by-Step Instructions
1. Prepare the Butterfinger Pieces
-
Unwrap all the Butterfinger bars.
-
Place them in a zip-top bag and crush with a rolling pin, or pulse in a food processor.
-
You want small chunks and crumbs, not a fine powder – the texture is part of the bliss.
-
-
Set aside about ¼ cup if you want some extra crumbs for sprinkling on top later.
2. Make the Peanut Butter Base
-
In a large mixing bowl, combine:
-
Peanut butter
-
Melted butter
-
-
Beat or stir until smooth and creamy.
-
Add the powdered sugar gradually, mixing until it forms a thick, soft dough.
-
Add the graham cracker crumbs and mix again.
-
The mixture should be thick but still easy to shape with your hands.
-
If it feels too sticky, add a bit more graham crumbs. If it feels too dry, add 1–2 teaspoons of melted butter or peanut butter.
3. Fold in the Butterfinger
-
Pour the crushed Butterfinger into the peanut butter mixture.
-
Fold gently with a spatula until everything is evenly distributed.
You should see visible chunks of candy throughout – that’s what gives the bites their crunchy, Butterfinger texture.
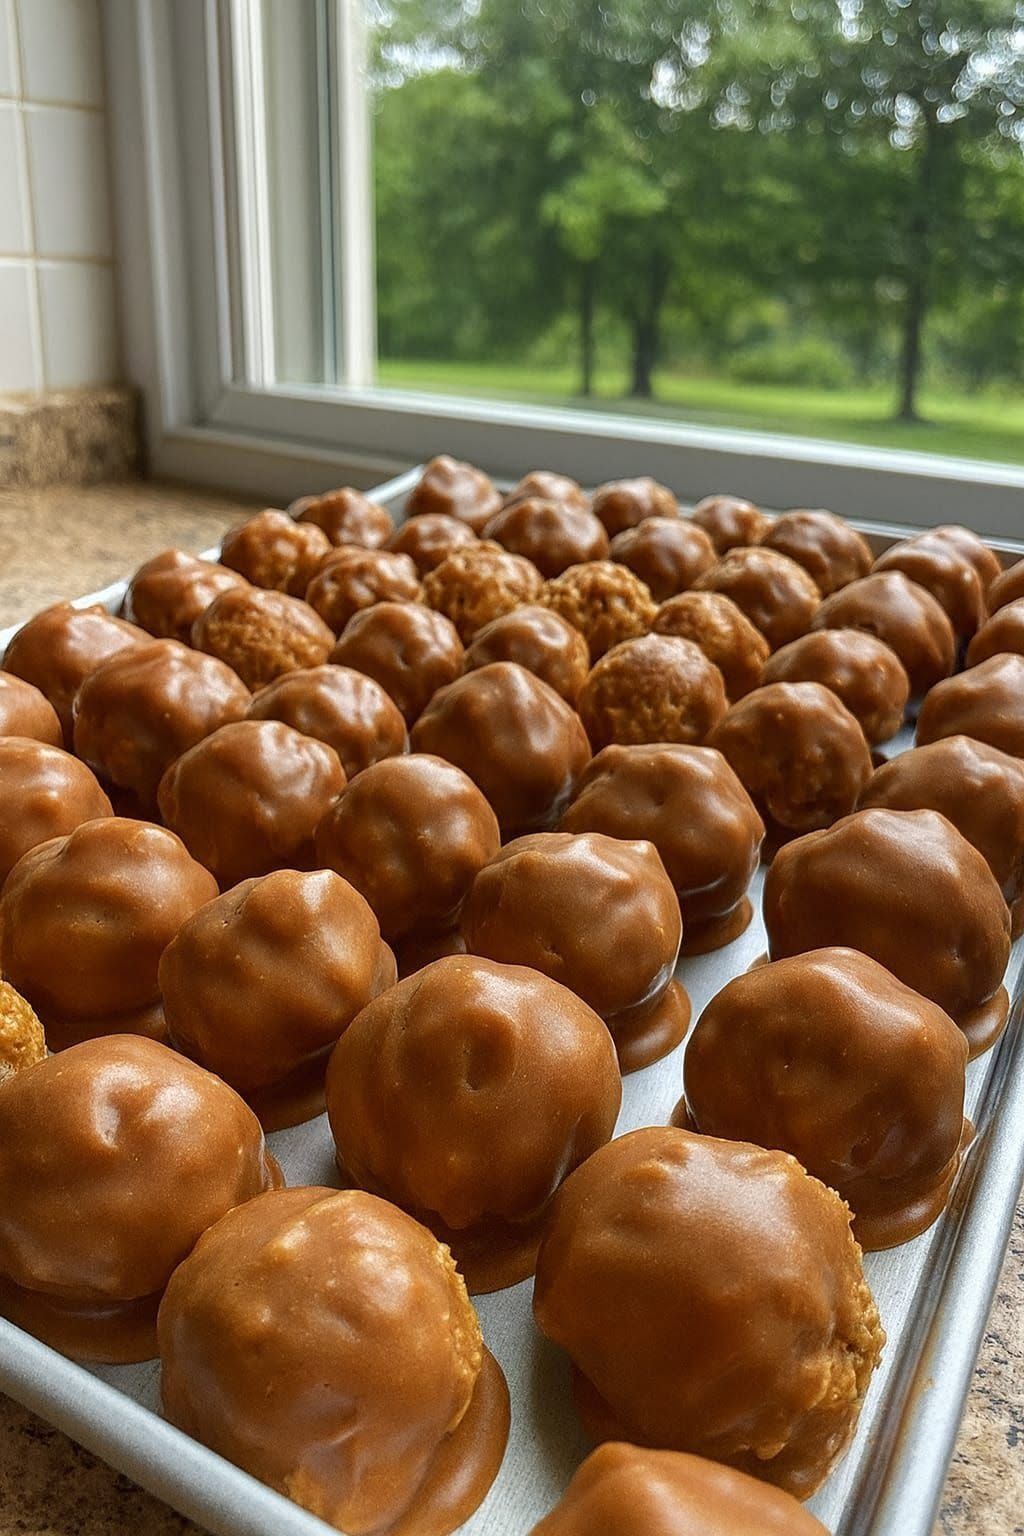
4. Shape the Bliss Bites
-
Line a baking sheet or large plate with parchment paper.
-
Using a small cookie scoop or a spoon, scoop portions of the mixture (about 1 tablespoon each).
-
Roll each portion quickly between your palms to form a smooth ball.
-
Place the balls on the lined tray, leaving space between them.
You should get roughly 24–30 balls, depending on size.
-
Once shaped, place the tray in the freezer for 20–30 minutes.
-
This helps the bites firm up and makes them easier to dip in chocolate without falling apart.
-
5. Melt the Chocolate Coating
While the bites are chilling:
-
Add the chocolate and coconut oil (if using) to a microwave-safe bowl.
-
Microwave in 20–30 second bursts, stirring well after each burst, until completely melted and smooth.
You can also melt the chocolate over a double boiler if you prefer.
Let the melted chocolate cool just slightly (1–2 minutes) so it’s warm and fluid but not scorching hot.
6. Dip the Butterfinger Bliss Bites
-
Remove the chilled balls from the freezer.
-
Using a fork, skewer, or dipping tool, dip each ball into the melted chocolate, coating it completely.
-
Gently tap off the excess chocolate on the side of the bowl.
-
Place each dipped bite back onto the parchment-lined tray.
While the chocolate is still wet:
-
Sprinkle a little crushed Butterfinger on top, or
-
Add a few flakes of sea salt for a sweet-salty contrast.
Repeat until all the bites are coated.
If the chocolate starts to thicken while you work, warm it in the microwave for a few seconds and stir again.
7. Let Them Set
-
Let the coated bliss bites sit at room temperature until the chocolate sets,
or place the tray in the fridge for 15–20 minutes for faster setting. -
Once the chocolate is firm, transfer the bites to an airtight container.
They’re ready to serve as soon as the coating is completely set and dry to the touch.
Storage & Make-Ahead
-
Store Butterfinger Bliss Bites in an airtight container in the fridge for up to 1 week.
-
For longer storage, you can freeze them for up to 2 months.
-
Place in a single layer on a tray to freeze, then transfer to a freezer bag or container.
-
Thaw in the fridge before serving.
-
They’re actually delicious straight from the fridge – the center stays soft but the chocolate has a nice snap.
Variations
You can change the character of these bites easily:
-
Extra Crunchy
Add ¼ cup extra graham crumbs or chopped peanuts for more texture in the center. -
Double Chocolate Butterfinger Bites
Use a mix of milk chocolate and dark chocolate for coating, or drizzle dark chocolate in thin lines over a milk chocolate shell. -
White Chocolate Butterfinger Bliss
Use white chocolate for the coating instead of dark/milk. The orange and brown Butterfinger bits look beautiful against the white shell. -
Mini Bite Version
Roll smaller balls (2 teaspoons each) to make more, smaller bites – perfect for large dessert trays.
Serving Ideas
-
Add them to your Christmas cookie/candy trays.
-
Pack 4–6 in a small gift box or bag with a ribbon for teachers, neighbors or coworkers.
-
Serve with coffee, hot chocolate or tea as a sweet after-dinner treat.
-
Use them as a topping: chop a few and scatter over ice cream or brownies.
